
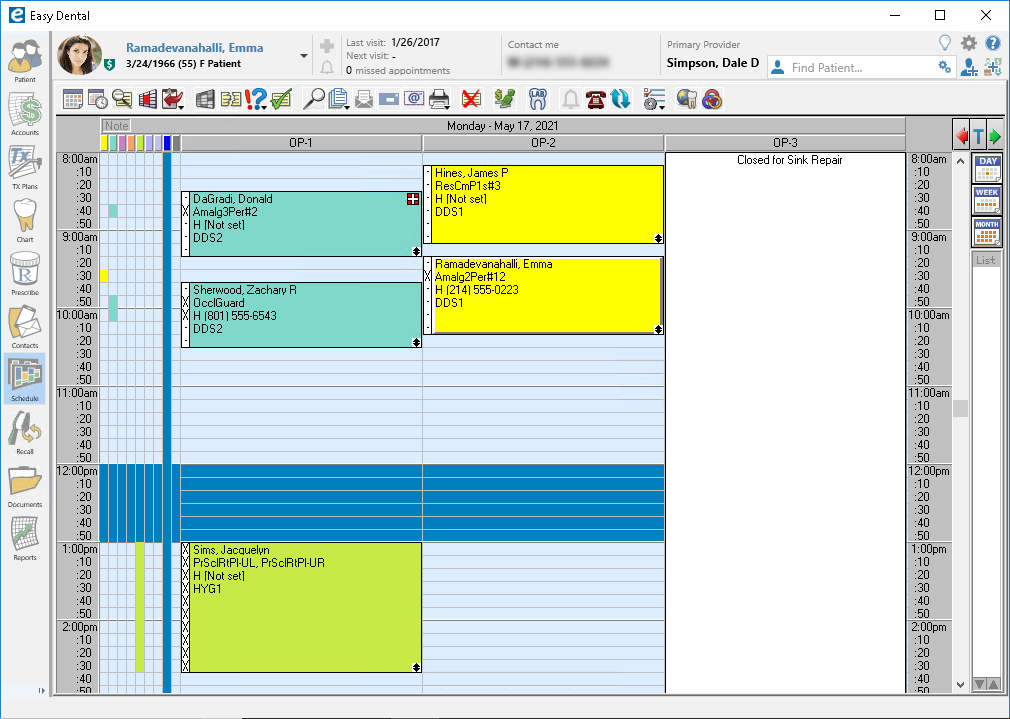
Using the Schedule Event feature, you can close individual operatories and block out time in the Schedule for things like staff meetings, vacation schedules, or operatory repairs without having to create “fake” appointments.
To create an event:
- Open the Schedule and click the Schedule Events button, or select a date and time for the event in the Schedule, right-click and select Schedule Event.
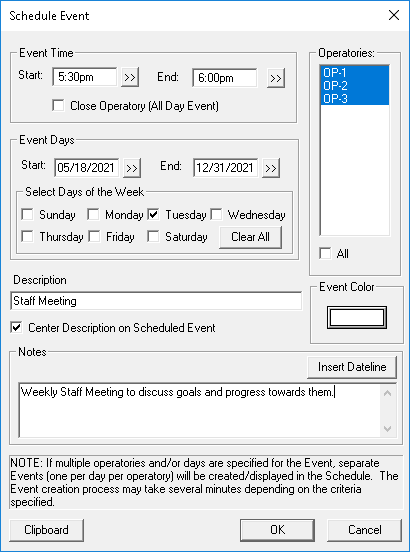
- Select the appropriate start and end times, date(s), and operatories to be included in the event and give the event a Description such as Closed for Repairs, Staff Meeting, etc.
- Select an Event Color that is different from your provider colors so the event will stand out on the Schedule.
- Click OK to schedule the event.
It’s that easy! Once an event has been created, it can be edited, deleted, or moved to the Clipboard by right-clicking it in the Schedule. Plus, you can schedule events up to a year in advance!
For more information see the Scheduling Events topic in Easy Dental Help.


